If your aircon has mould in it, it's blowing mould spores into every room every time it runs. The good news is you can fix it yourself without calling a tradie, and without pulling the unit off the wall. This guide covers what causes mould to grow inside an aircon, how to spot it, what it's doing to your health, and how to remove it properly.
What causes mould in aircon units
Your air conditioner creates the perfect environment for mould without any help from you. Every time it runs in cooling mode, the evaporator coil gets cold and moisture from the air condenses on its surface. That condensation drips into a drain tray and exits through a drain line. The system is designed to manage that moisture, but it can't eliminate it entirely.
What's left behind is a coil that stays damp, in a dark enclosed housing, with a constant supply of dust and organic particles from the air passing through. Mould needs moisture, a food source, and somewhere to anchor. An aircon unit provides all three.
A few things accelerate the process:
- Filters that haven't been cleaned, restricting airflow and trapping moisture inside the unit
- A blocked or slow drain line that lets water pool in the tray instead of draining away
- Running the unit and shutting it off immediately, leaving internal surfaces wet
- High humidity in the room, particularly in Queensland, coastal NSW, and tropical areas of Australia
- Long periods of inactivity with residual moisture sitting inside a sealed unit
Any one of these is enough to get mould started. Most units that haven't been cleaned in over six months have at least some mould growth on the coil or drip tray, even if there are no obvious visible signs yet.
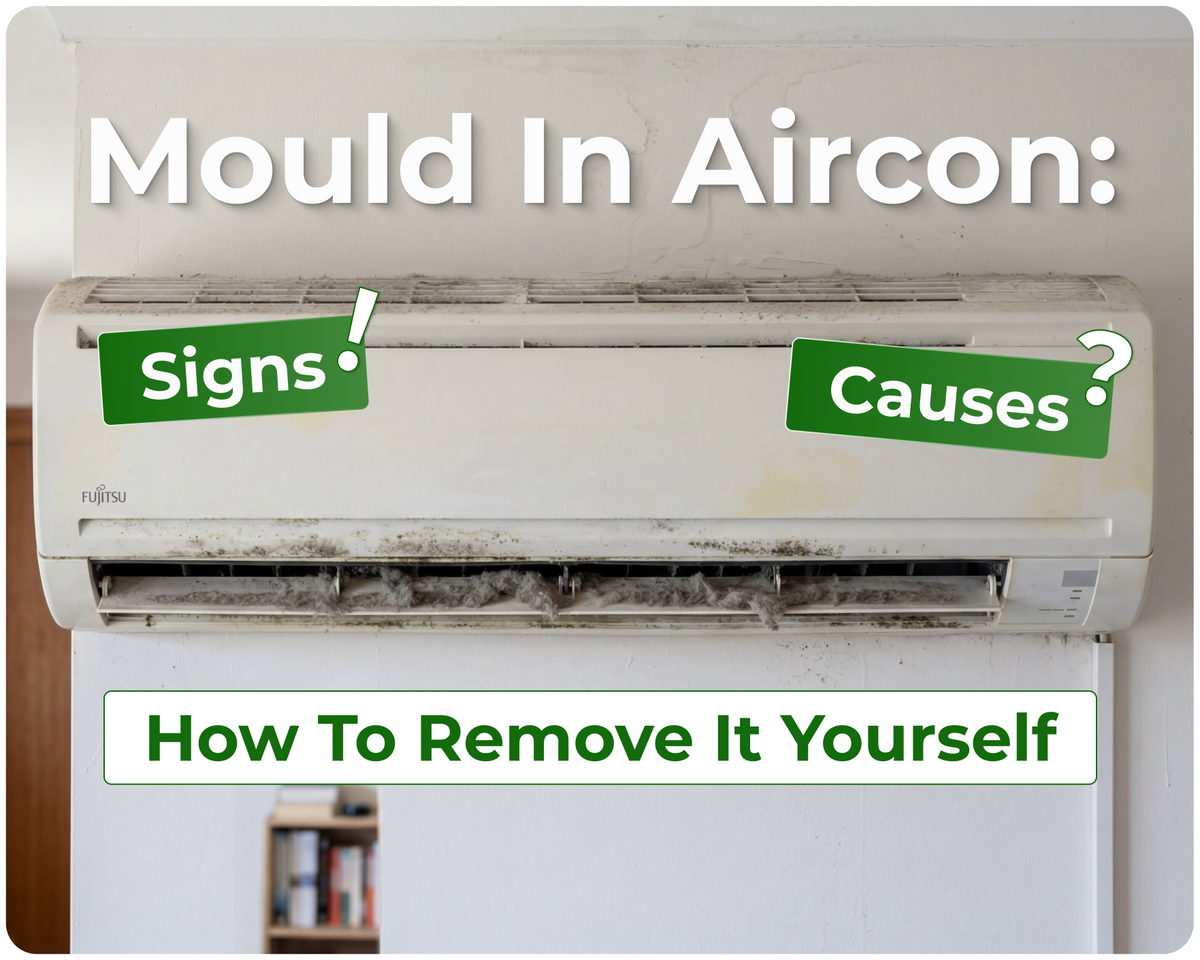
Signs you have mould in your aircon
Musty or stale smell when it runs This is the most common first sign. The smell is caused by microbial volatile organic compounds released as mould grows. It's often strongest when the unit first starts up and fades slightly once the room cools, which is why people ignore it or assume it will pass. It won't. The mould producing it is still there. Read more about why your aircon smells musty and what's actually causing it.
Dark spots or black residue inside the unit Open the front panel and look at the filter and the coil behind it. Black or grey discolouration, dark streaks, or a fuzzy appearance on internal surfaces are visible mould colonies. These aren't dust. Dust is grey and powdery. Mould has a darker, sometimes slightly textured appearance and tends to cluster in patches.
Black dust around the vents or on the ceiling If you're seeing dark marks on the wall or ceiling around the aircon grille, mould spores are being pushed out with the airflow and settling on surfaces. At that point the growth inside the unit is significant enough to be spreading.
Increased allergy or respiratory symptoms indoors Sneezing, congestion, itchy eyes, or a persistent cough that gets worse when the aircon is running are all signals worth taking seriously. If symptoms improve when you leave the house or when the unit is off, mould in the aircon is a likely contributor.
Water leaking from the indoor unit A blocked drain line causes water to back up into the drain tray and eventually overflow. That water sitting in the tray is also a direct cause of mould growth in the drip tray and on surrounding surfaces.
Why mould in aircon is a health problem
Mould reproduces by releasing spores into the air. When your aircon has mould growing on the coil or in the tray, those spores get picked up by the fan and pushed through your home every time the unit runs. You breathe them in without knowing it.
The health effects depend on how much mould is present, how long exposure has been going on, and how sensitive the people in the home are. Common reactions include:
- Respiratory irritation, coughing, and wheezing
- Worsening asthma and hay fever symptoms
- Sinus congestion and headaches
- Skin and eye irritation
- Fatigue and general feeling of being unwell indoors
Children, elderly people, pregnant women, and anyone with a compromised immune system are most at risk. But even healthy adults will notice the effects with prolonged exposure to a heavily moulded unit.
The other thing worth knowing is that mould doesn't stay in the aircon. Spores land on walls, furniture, curtains, and ceiling surfaces and can start new growth anywhere conditions are right.
Where mould grows inside an aircon
Understanding where mould accumulates helps you clean the right areas rather than just rinsing the filter and hoping for the best.
Evaporator coil This is the primary site. The coil stays cold and damp during operation and is the most common location for mould to establish. It sits directly behind the filter and is often missed because most people only clean the filter itself.
Drip tray The shallow tray that catches condensation from the coil. If drainage is slow or blocked, water sits in the tray and mould grows along the edges and base. A blocked drain line is one of the fastest ways to accelerate mould growth in a unit.
Blower wheel and fan barrel The fan that pushes air into the room sits behind the coil. It's difficult to see without removing the front casing but it's a common mould location because it stays damp and accumulates dust quickly.
Louvres and air outlet The adjustable slats at the front of the unit. Visible mould here usually means the growth inside is already established and spreading outward.
Return air grille and filter (ducted systems) For ducted systems, the return air grille is where air enters the unit. Mould on the grille or filter indicates spores are circulating through the ductwork.
How to remove mould from your aircon yourself
You don't need a tradie for this. A full DIY clean removes mould from the coil, tray, blower, and internal surfaces and is something most homeowners can do in under 30 minutes with the right kit.
Here's what the process involves:
- Turn the unit off at the wall and isolator
- Open the front panel and remove the filters
- Fit a catchment bag around the base of the unit to protect walls and flooring
- Apply a professional-grade coil cleaner to the evaporator coil, blower wheel, and drip tray
- Work through the internal surfaces with a brush, loosening mould and built-up grime
- Rinse thoroughly with clean water using a pump bottle, flushing debris into the catchment bag
- Clear the drain line to ensure water is draining freely
- Rinse the filters under warm water, dry them fully, and reinstall
- Close the unit, restore power, and run on fan mode for ten minutes to finish drying
Our DIY aircon cleaning kit includes everything needed for this process. It comes with Viper Evap+ professional-grade coil cleaner, a catchment bag, brushes sized for internal components, a pump bottle for rinsing, microfibre cloths, and a collapsible bucket. The solution is validated by UNSW and Eurofins testing, and is safe for use in homes with children, pets, and pregnant women.
The kit is reusable, so you're set up for every clean going forward without paying a call-out fee each time.
How to stop mould coming back
Removing the mould is step one. Keeping it from returning is where most people fall short because they do one clean and go back to the same habits that caused the problem.
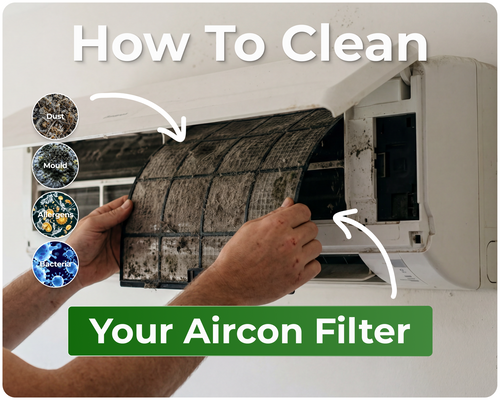
Clean the filter regularly A clean filter keeps airflow strong and reduces the moisture and dust buildup that mould feeds on. Every three to six months is the right interval for most homes. Read the full guide on how to clean your aircon filter if you want the step-by-step process.
Run the unit on fan mode before switching it off After cooling or heating, running on fan-only mode for five to ten minutes dries the internal surfaces before the unit sits idle. This single habit reduces residual moisture significantly and slows mould regrowth.
Do a full internal clean every three to six months Filter cleaning maintains airflow but doesn't touch the coil, tray, or blower. A full kit clean every three to six months is what keeps those areas clear. Before summer and before winter are natural trigger points that work well for most households.
Keep the drain line clear If you notice water pooling near the unit or dripping from the indoor head, check the drain line. A slow or blocked drain is one of the fastest routes to mould in the tray. Most blockages can be cleared with a simple flush.
Use an anti-mould diffuser after cleaning After a full clean, an anti-mould aircon diffuser helps maintain clean air between cleans by continuously reducing airborne mould and bacteria inside the unit. It's not a substitute for cleaning, but it extends the benefit of each clean and reduces how quickly mould reestablishes.
When to call a professional
DIY cleaning handles the vast majority of aircon mould situations. Call a professional if:
- Mould is visible spreading onto surrounding walls or ceiling and the growth is extensive
- You or someone in the home has a serious respiratory condition and any mould exposure is a medical concern
- The unit is a ducted system with mould visible deep in the ductwork
- After a thorough clean the smell persists and performance doesn't improve, which can indicate a refrigerant issue or a deeper duct problem
For standard split system mould, a DIY clean is fully sufficient and produces the same result as a professional service at a fraction of the cost.
The short version
Mould in an aircon is common, it's a health risk, and it's fixable without a tradie. The coil, drip tray, and blower are where it grows. A filter rinse alone won't remove it. A full internal clean with the right coil cleaner will. Clean the filter every three months, do a full kit clean twice a year, and run fan mode after use to keep it from coming back.